

Your Personal Brand’s Knowledge Base is where you bring your unique expertise, experiences, and ‘genius zones’ into Scripe. This is what makes content generated by Scripe feel like you – ensuring your content resonates with you and your target audience. It’s your place to add personal stories, lessons learned, frameworks, and anything else that reflects your career, expertise, and perspective.Documentation Index
Fetch the complete documentation index at: https://docs.scripe.io/llms.txt
Use this file to discover all available pages before exploring further.
Why the Personal Brand Knowledge Base Matters
- Authenticity: Scripe writes posts that reflect your unique background (nobody has the same experience combo like you, let’s show that!)
- Expert positioning: Share your niche knowledge and frameworks.
- Scalable storytelling: Personal stories and experiences fuel unique content.
- Alignment with company knowledge: Scripe blends your personal inputs with the shared Company Knowledge Base.
Basic Knowledge Base Set-Up:
- Go to the Personal Brand you want to edit.
- In the dashboard, on the left sidebar, click Knowledge Base.
- On the Overview Page, click on
+ New Content Source - Add at least two items to complete the basic setup.
What to Add to your Knowledge Base
Share Your Background & Career Journey
Scripe should understand who you are and where you come from.What to include:✔️ Short bio (career highlights, roles, industries).
✔️ Motivations (in your daily professional life & why you build your brand).
✔️ Key career milestones or turning points.
✔️ Personal values & principles.📝 Example:Upload interviews where you talk about why you do what you do, podcast recordings or personal motivation statements.
✔️ Motivations (in your daily professional life & why you build your brand).
✔️ Key career milestones or turning points.
✔️ Personal values & principles.📝 Example:Upload interviews where you talk about why you do what you do, podcast recordings or personal motivation statements.
Document Your Expertise Areas
Help Scripe know what you want to be known for.Tip: Refer to the expertise areas you listed in your Content Strategy.What to include:✔️ Resources that cover core expertise areas.
✔️ Frameworks, models, or methods you use.
✔️ Specialist skills or certifications.
✔️ Your “point of view” on industry topics.📝 Example:Link Notion pages of the frameworks you use, upload podcasts that cover your expertise, expert interviews or reports.
✔️ Frameworks, models, or methods you use.
✔️ Specialist skills or certifications.
✔️ Your “point of view” on industry topics.📝 Example:Link Notion pages of the frameworks you use, upload podcasts that cover your expertise, expert interviews or reports.
Add Personal Stories & Anecdotes
Stories make content relatable and memorable. Add your personal experiences and lessons learned.What to include:
- ✔️ Founder story/career shifts.
- ✔️ Insights from client wins and failures.
- ✔️ Lessons learned from career milestones/challenges.
- ✔️ Anecdotes from daily work life
Meeting recordings from weekly / monthly checkins with your team in which you talk about wins and learnings from the past weeks, or interview recordings.
3. Automatic Sources
Besides the sources you set up yourself, Scripe also gathers knowledge automatically via:WhatsApp Connection
Anything you send to Scripe via your WhatsApp connection (messages or voice notes) will be added directly to your Knowledge Base. That way, your quick thoughts and ideas are always captured without extra steps.
LinkedIn Profile & Posts
Scripe automatically pulls in your LinkedIn profile and posts — including posts you made before using Scripe. This ensures your Knowledge Base reflects your full history, not just new content.
4. Organize Your Content with Folders
To keep your Knowledge Base clean and easy to navigate, you can create folders and subfolders. This helps you group knowledge by themes or use cases. Suggested folder structure:- Bio & Background
- Expertise & Interests
- Personal Stories
- External Content
Note: When you connect Notion or add a Website as a source, Scripe automatically creates a folder for it in your Knowledge Base. This keeps external content organized right from the start.
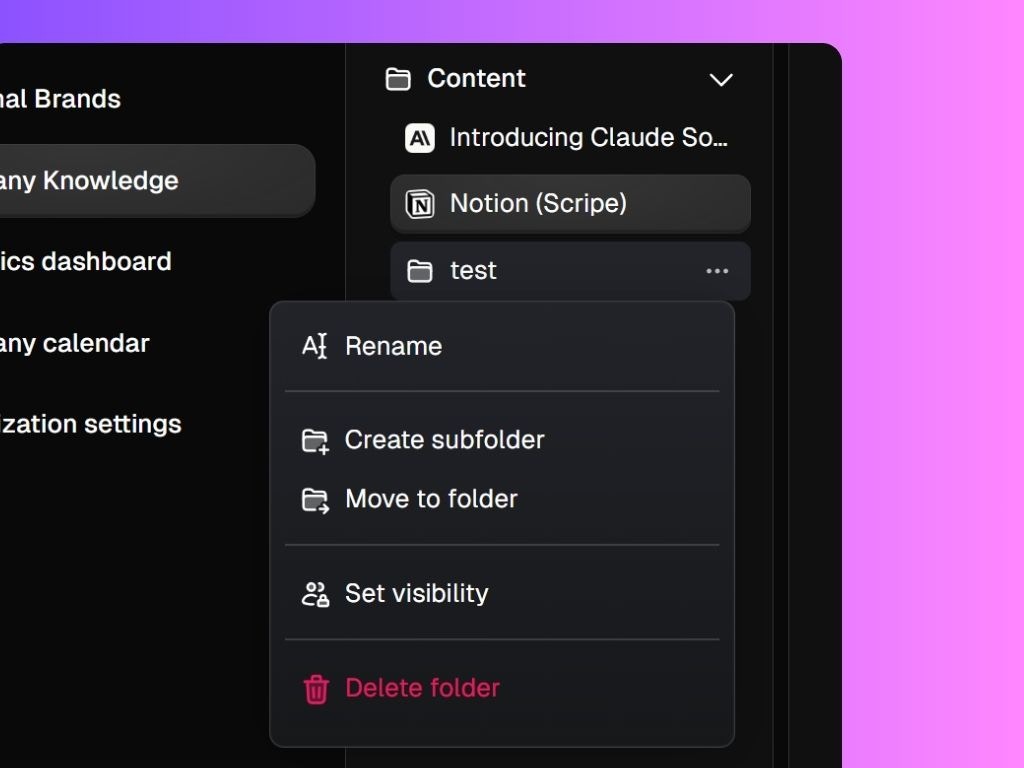
... , you can:
- Rename → update the folder name
- Create subfolder → add a layer of organization under a folder
- Move to folder → rearrange items into different folders
- Delete folder → remove it when no longer needed