In Scripe, a workspace is your content environment. Each workspace contains one or more personal brands (the profiles you create and post content for).
The General tab in your settings allows you to manage key details about your workspace in Scripe. From here, you can update your profile, add verified domains, and control access to your workspace.
Workspace Settings:
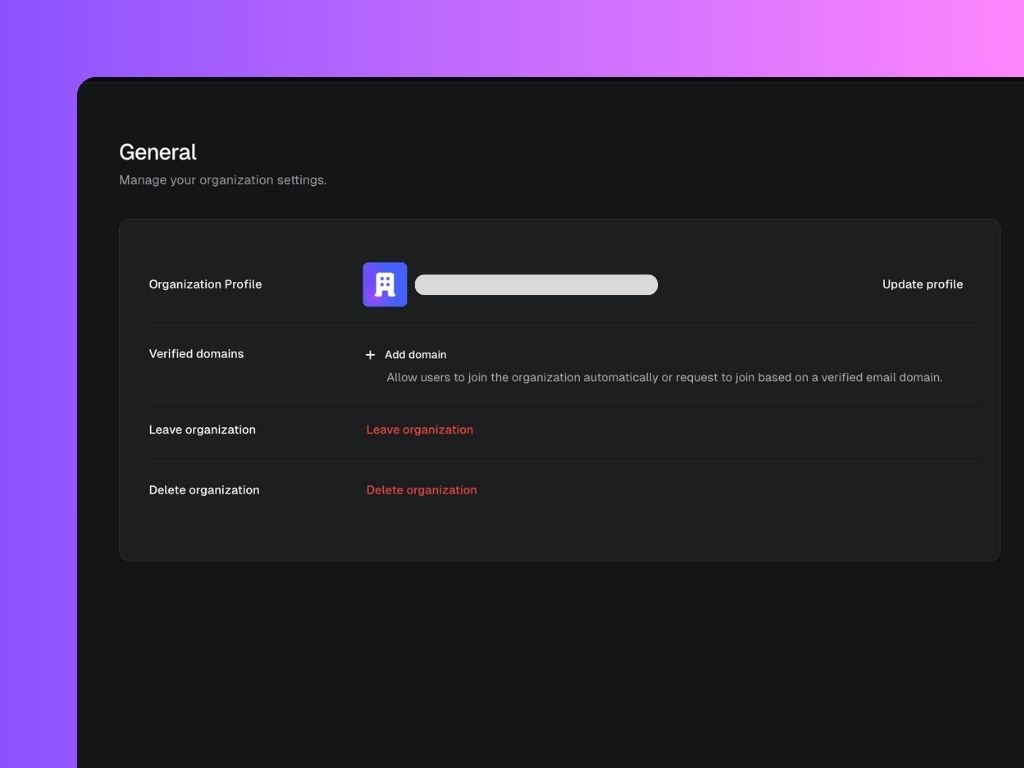
Organization Profile
Your organization profile includes the name, logo, and unique identifier (slug) of your workspace.
- Logo: Upload a custom image (recommended size: 1:1, up to 10MB) to personalize your workspace.
- Name: The display name of your workspace in Scripe.
- Slug: A unique identifier automatically generated when you create your organization. This helps Scripe distinguish your workspace from others.
To update your profile, click Update profile, make your changes, and hit Save.
Verified Domains
Adding a verified domain allows people with matching email addresses to easily request to join your workspace.
For example, if you verify company.com, anyone with an email ending in @company.com can be recognized as part of your organization.
Leaving or Deleting an Organization
- Leave organization: Removes your personal account from the organization. You will no longer have access to its workspaces, brands, or content.
- Delete organization: Permanently deletes the organization and all of its data from Scripe.
Both actions cannot be undone, so only do this if you are sure you no longer need the workspace.
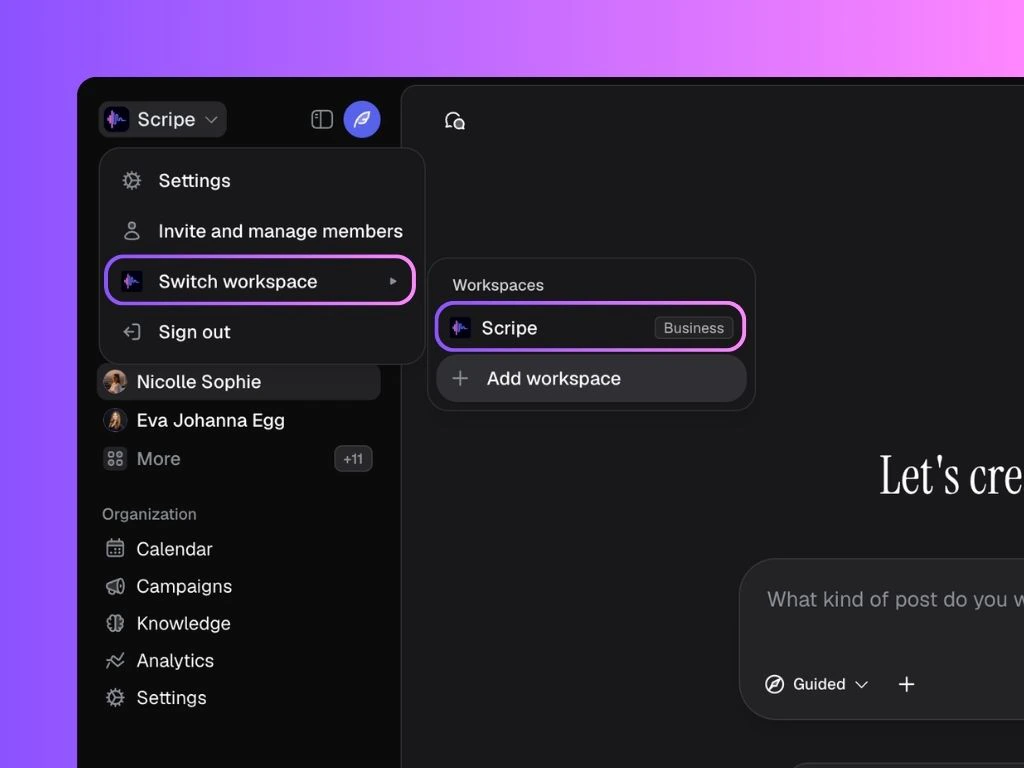
How to Switch Workspaces 🔄
If you’re in an Agency plan and have more than one workspace set up, this is how you switch between workspaces:
- Click your profile icon in the top-left corner of Scripe.
- Select “Switch workspace.”
- A menu will appear showing all the workspaces you belong to.
- Click on the workspace you want to enter.
You can be part of multiple workspaces. Just use the workspace switcher to move between them anytime.