This feature is only available on the Business Plan.
Overview
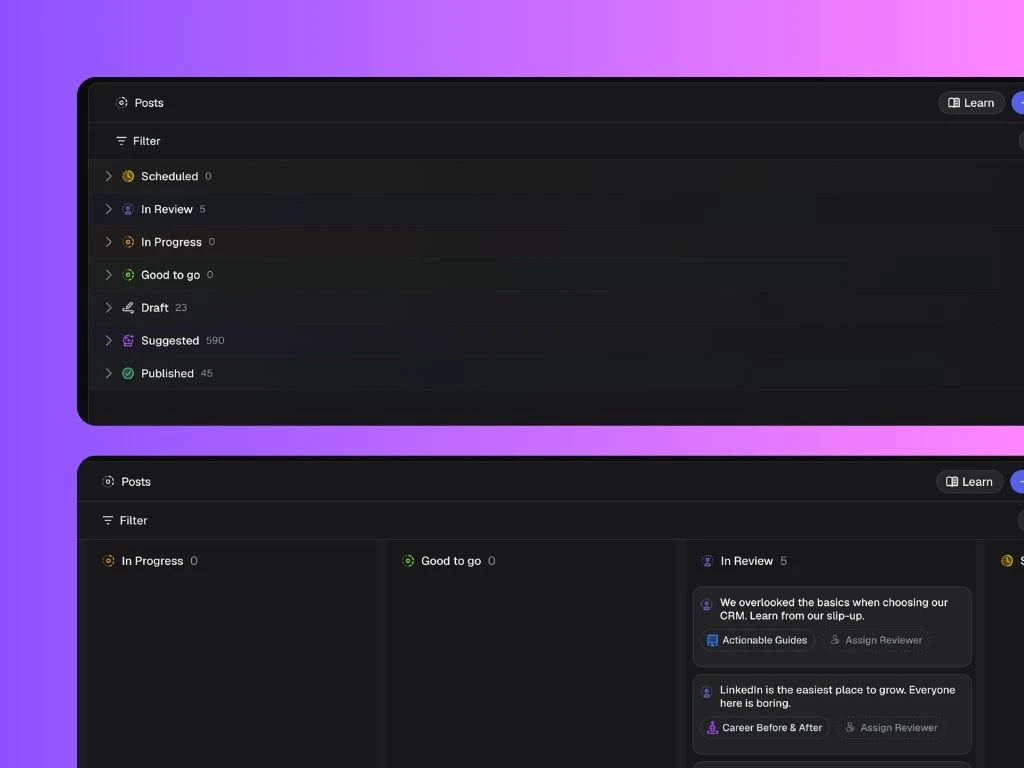
Post statuses represent the different stages of your content creation process. Each post in Scripe has a status assigned to it — for example: Draft, In Progress, In Review, Scheduled, or Published. From here, you can:- Create custom statuses to match your workflow.
- Rename or remove existing custom statuses.
- Organize your team’s posting process end-to-end.
Customizable Statuses
You can fully customize the workflow around your drafts, progress, and reviews. This is where you can adapt Scripe to fit your internal process, whether it’s just you or a larger content team. You can add multiple:- Draft statuses (e.g., “Draft”, “Idea”)
- In Progress statuses (e.g., “Writing”, “Designing”)
- In Review statuses (e.g., “Review by Marketing”, “Review by Client”)
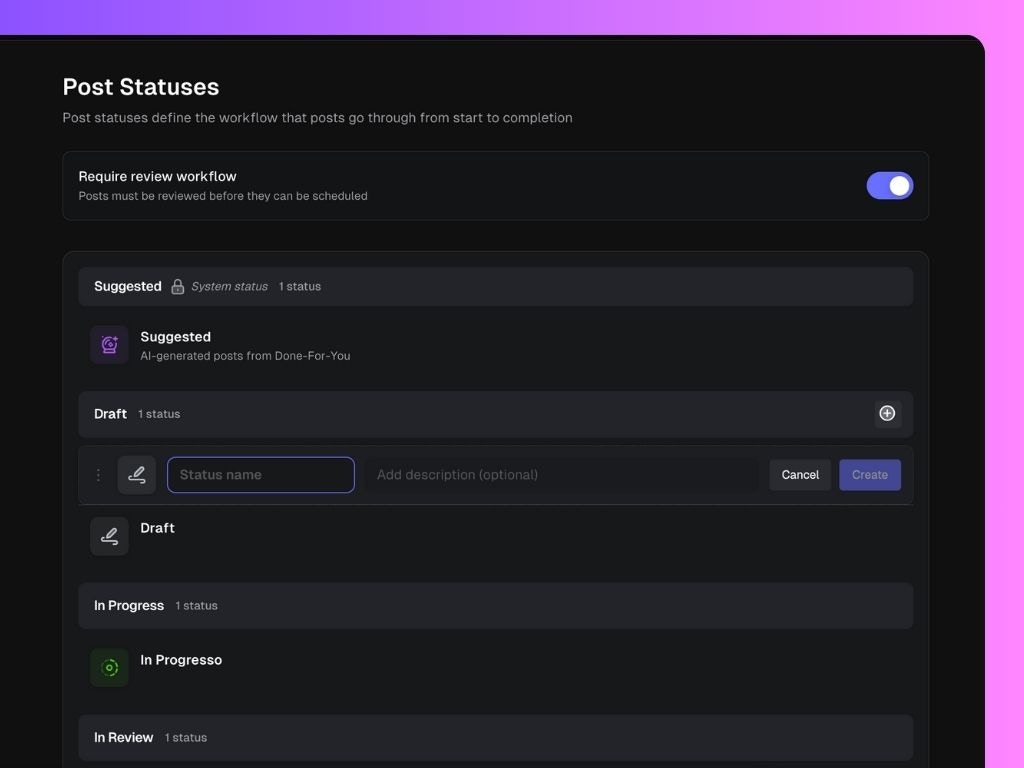
- A unique name
- An optional description
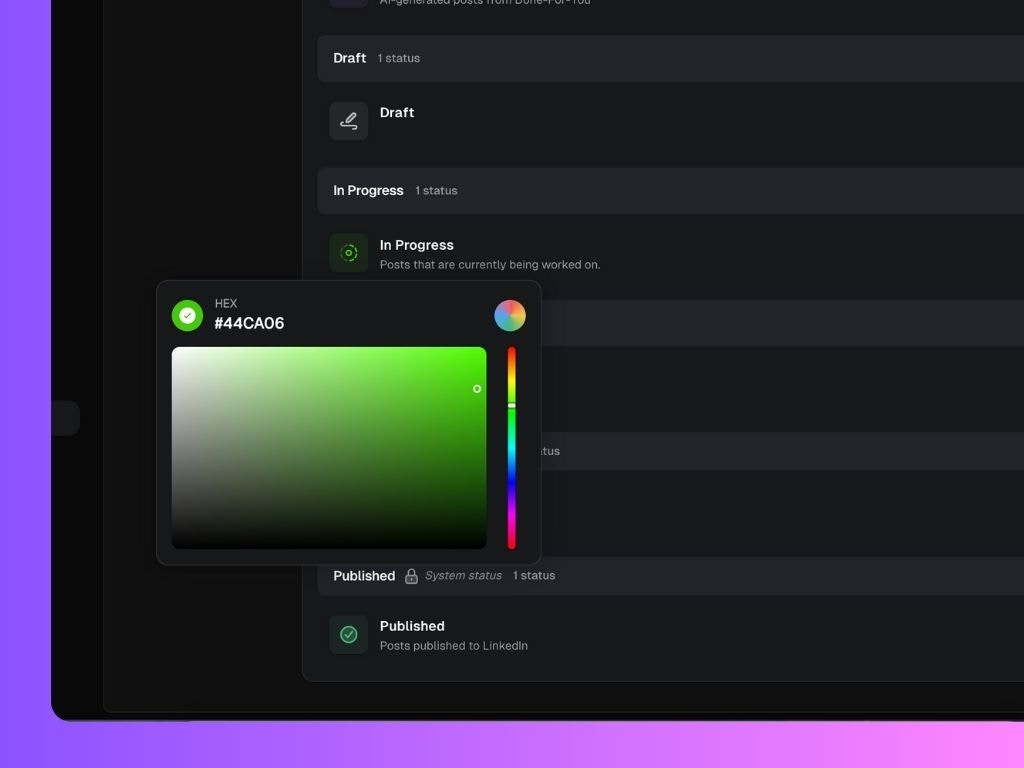
- A color-coded icon for clarity
Default System Statuses
Some statuses are system-locked and cannot be deleted or duplicated. These are essential for Scripe’s publishing flow and ensure your workspace stays consistent.- Suggested → Used for AI-generated posts from Done-For-You (Scripe suggestions).
- Scheduled → Automatically applied to posts that are currently scheduled for publishing.
- Published → Automatically assigned to posts that have already been published on LinkedIn.
Deleting a Status
When deleting a custom status, you’ll be prompted to reassign all posts that currently use that status to another one within the same category. This ensures that no post is left without a valid workflow stage.Require Review Workflow
At the top of the page, you’ll find a toggle called Require review workflow. When enabled, every post must be reviewed before it can be scheduled. This ensures a consistent approval process and prevents accidental publishing.Where It Appears
Once your statuses are set up, they’ll appear on the Posts page for every Personal Brand in your workspace. There, users can manage posts in list view or kanban view, depending on their individual preference. Each post or row will display its current status, and users can easily drag, drop, or change statuses as they progress through their content pipeline. Users can also change the status of a post inside the Post Editor.