

- Workspace Knowledge Base (Company-wide): Content uploaded here is applied to ALL personal brands in your workspace. Ideal for brand guidelines, company case studies, or shared playbooks.
The Workspace Knowledge Base is available on Pro and Agency plans. Learn how to set it up here →
- Personal Brand Knowledge Base (Individual): Content uploaded here is ONLY used for your brand. Keep all your individual notes, stories, and inputs here for brand-authentic content.
How to set up your Personal Brand’s Knowledge Base
1. Go to Your Knowledge Base
- Go to the Personal Brand you want to edit.
- In the dashboard, on the left sidebar, click Knowledge Base.
2. Set Up your Sources
Your Personal Brand Knowledge Base can pull from many different types of sources. Whatever you add here, will be used as context to make better content and sound more like you. You can add sources by clicking on the+ New Content button on the top right side.
Here’s what each option means — and what’s best to add:
Text Notes
Quick, text-only entries that you add manually.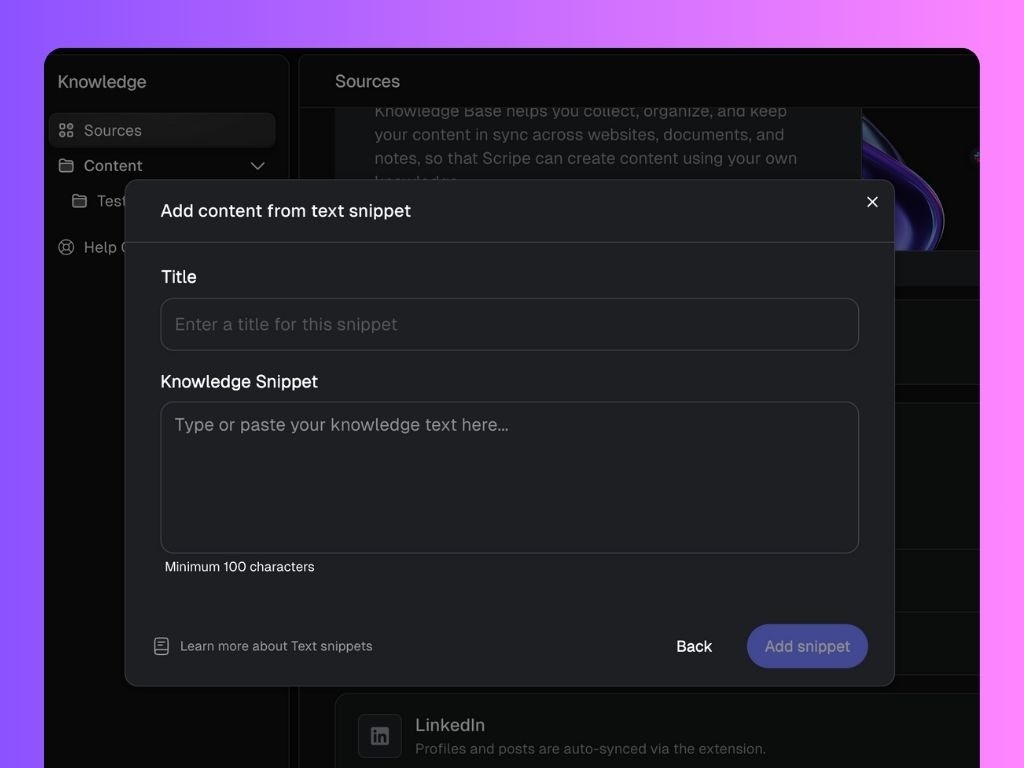
-
- Raw thoughts, lessons learned, or personal stories
-
- Copy/paste insights from ChatGPT or other drafts
-
Documents
Upload any file that contains valuable knowledge or content you’ve created. Scripe will read and extract the text, making it available for your content generation.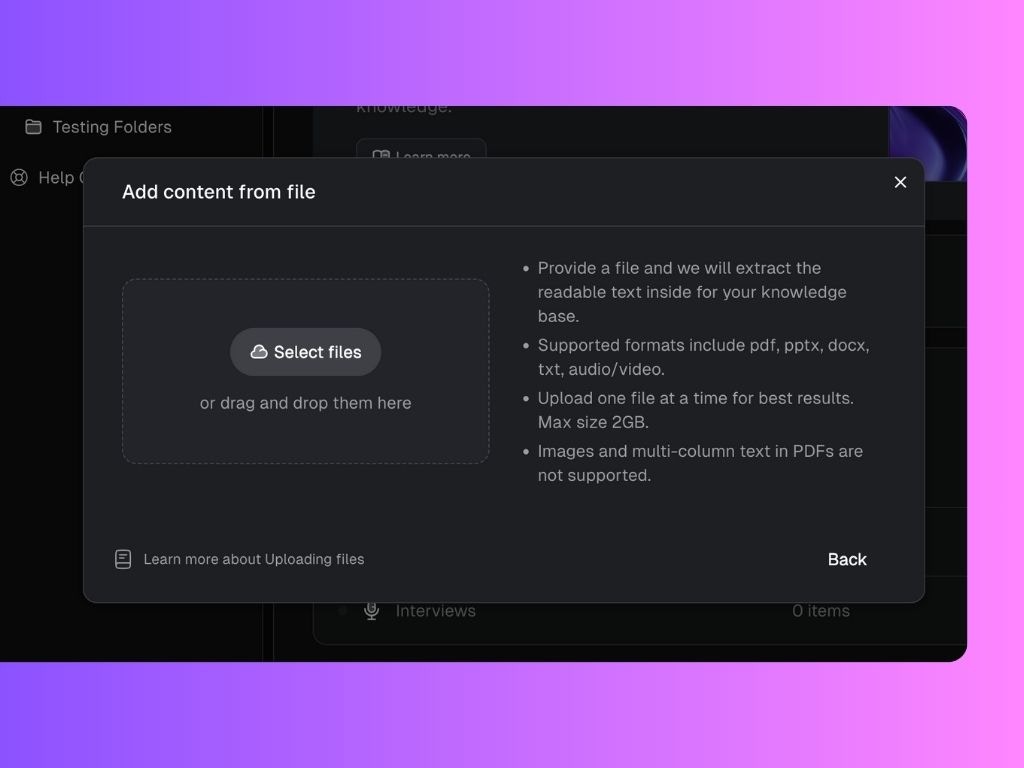
-
- Client case studies saved as PDFs
-
- Sales decks or training presentations
-
- Internal playbooks or strategy docs
-
- Whitepapers, research, or long reports
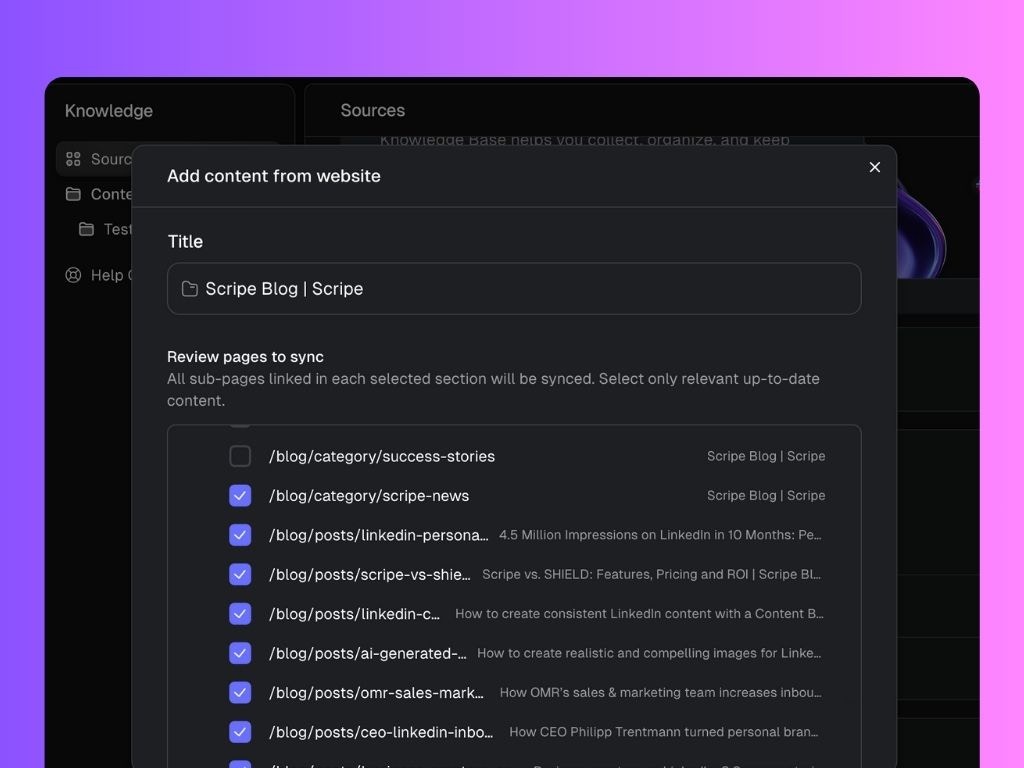
Websites
Connect public web pages so Scripe can read and use them as knowledge sources. Great for anything you’ve already published online.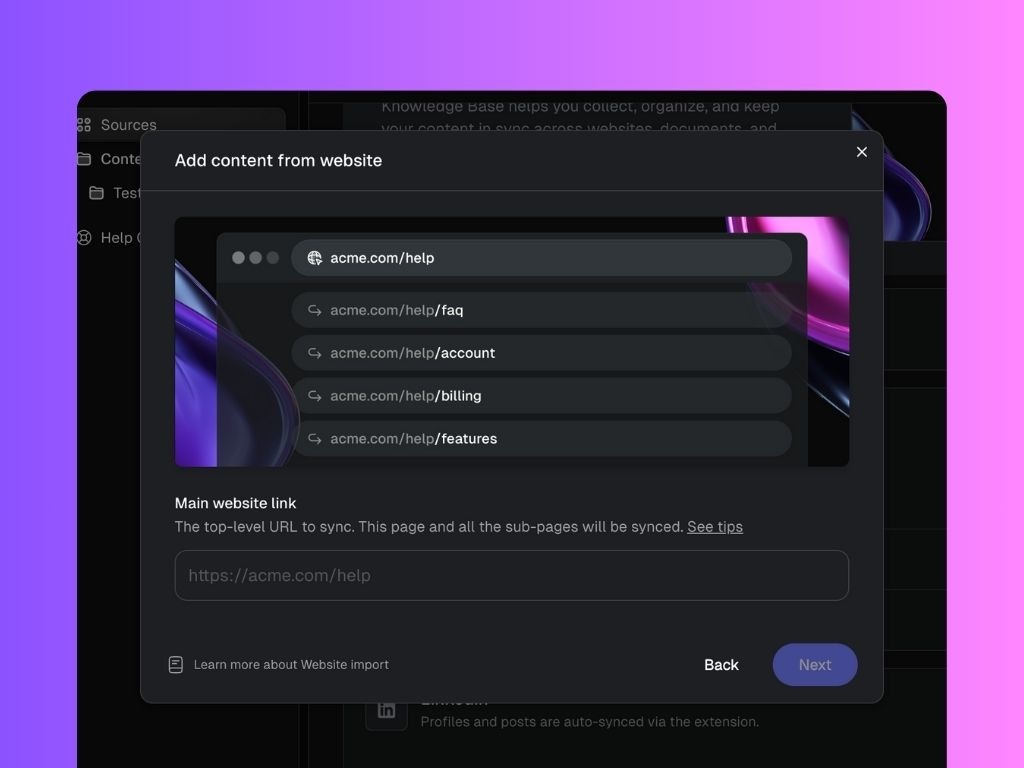
-
- Blog posts or articles
-
- Press features or interviews about you
-
- FAQ or About Me pages
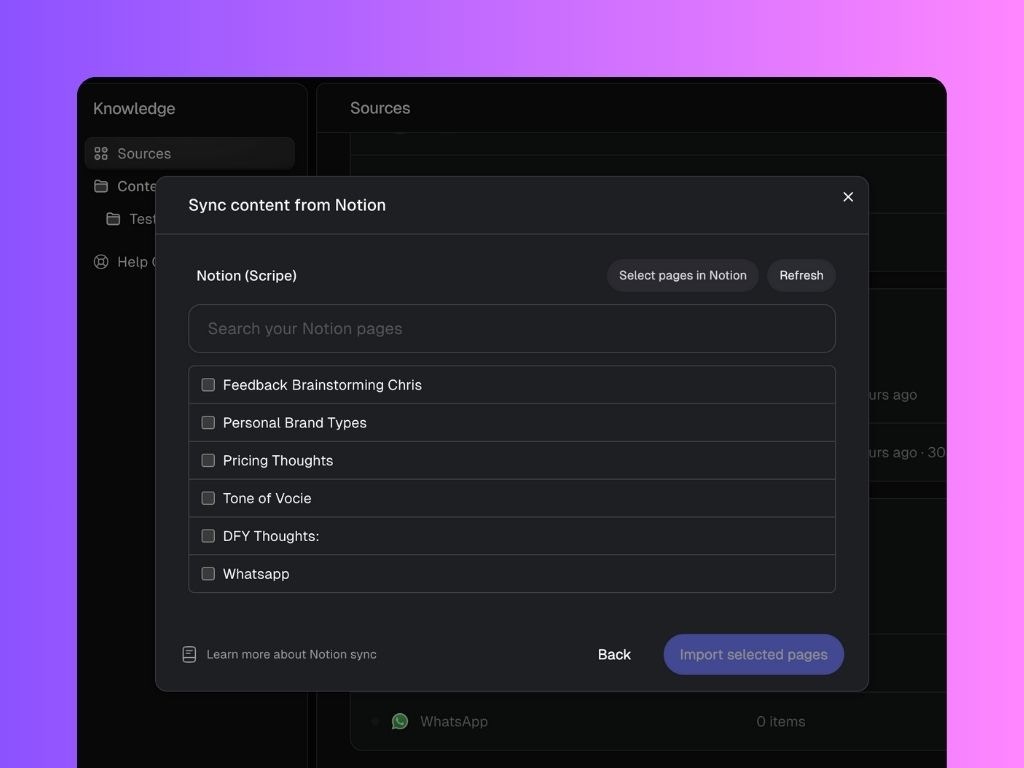
Notion
-
Connect your Notion account and choose the pages you want Scripe to use as knowledge. Perfect if you already use Notion to store notes, drafts, or playbooks.
-
- Workflow breakdowns or step-by-step processes
-
- Meeting notes or strategy docs
-
- Frameworks and templates you’ve built
Youtube Videos
Add links to your YouTube videos, and Scripe will automatically pull the transcript to use as knowledge. Great for capturing your spoken content without extra work.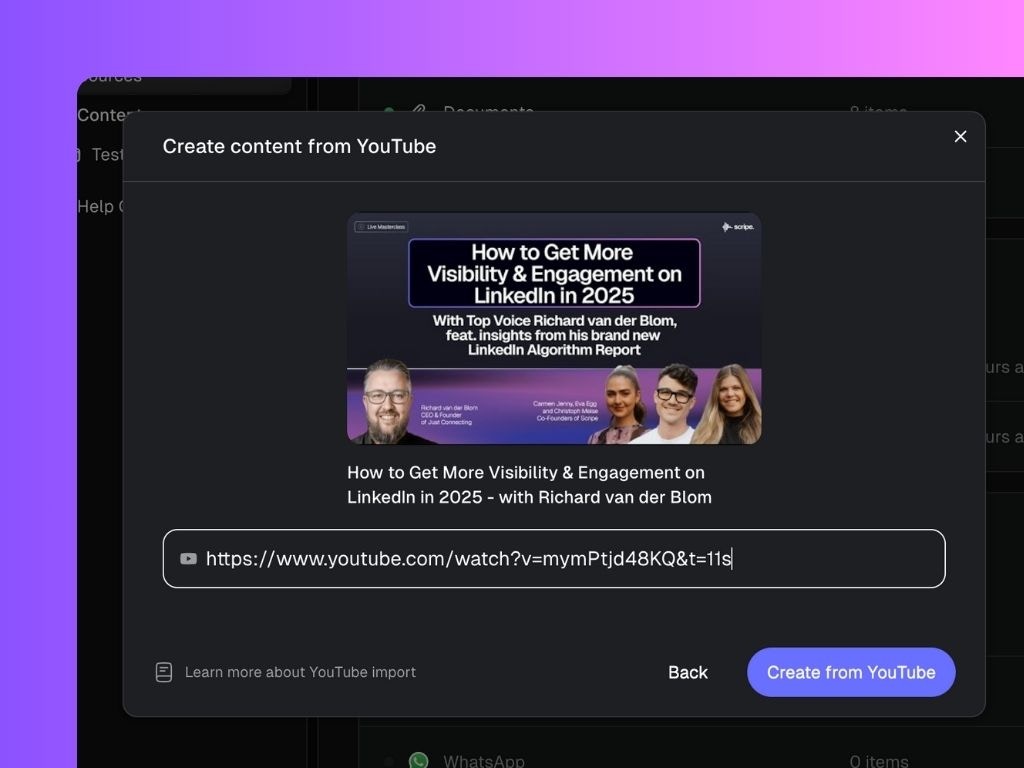
-
- Webinars or online workshops you’ve hosted
-
- Guest appearances on podcasts
-
- Keynotes, conference talks, or panel discussions
-
- Video tutorials or how-to guides you’ve recorded
3. Automatic Sources
Besides the sources you set up yourself, Scripe also gathers knowledge automatically via:WhatsApp Connection
Anything you send to Scripe via your WhatsApp connection (messages or voice notes) will be added directly to your Knowledge Base. That way, your quick thoughts and ideas are always captured without extra steps.
LinkedIn Profile & Posts
Scripe automatically pulls in your LinkedIn profile and posts — including posts you made before using Scripe. This ensures your Knowledge Base reflects your full history, not just new content.
If you haven’t connected your WhatsApp yet, follow this guide to set it up: How to connect WhatsApp to Scripe →
4. Organize Your Content with Folders
To keep your Knowledge Base clean and easy to navigate, you can create folders and subfolders. This helps you group knowledge by themes or use cases. 💡 Examples of folder structures:- Sales Playbook → outbound workflow, client case studies
- Personal Stories → founder journey, lessons learned, anecdotes
Note: When you connect Notion or add a Website as a source, Scripe automatically creates a folder for it in your Knowledge Base. This keeps external content organized right from the start.
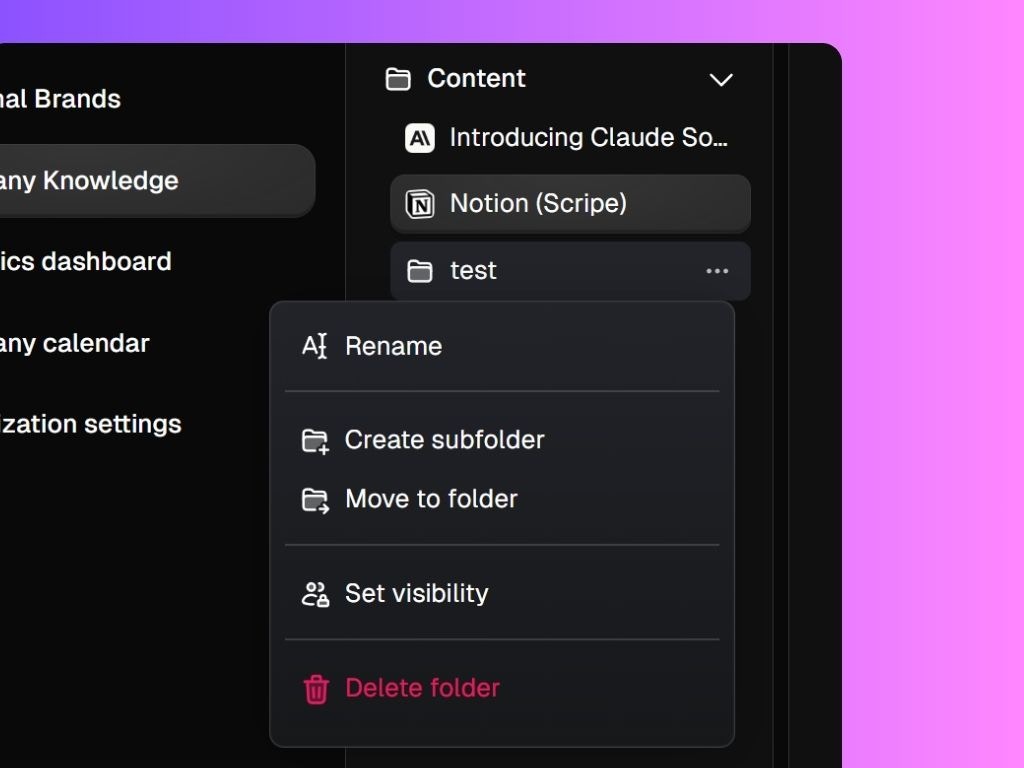
... , you can:
- Rename → update the folder name
- Create subfolder → add a layer of organization under a folder
- Move to folder → rearrange items into different folders
- Delete folder → remove it when no longer needed